#How To Setup FTP For WordPress
Explore tagged Tumblr posts
Visit Tumblr Blog
Explore Tumblr blogs with no restrictions, modern design and the best experience.
Last Seen Tumblr Blogs


Fun Fact
Tumblr Inc. has $15.1M in annual revenue.
Text
Learn how to create an FTP account in WordPress with this detailed guide to Gain greater control over your website's files by setting up FTP access.
#How to create an FTP account for your WordPress site#How to Setup an FTP Account for WordPress?#How to Create a FTP account for your Wordpress Website?
0 notes
Text

#WordPress#FTP#WebDevelopment#WebDesign#Coding#WebsiteManagement#TechTips#HowTo#StepByStepGuide#Security#WorkflowOptimization#wpwebinfotech#How To Setup FTP For WordPress? (Complete Guide)
0 notes
Text
Boost Your Online Presence with Hostinger in 3 Simple Steps 🚀
Want to take your online presence to the next level? Whether you’re launching an online store, a creative portfolio, or a travel blog, Hostinger is here to support you. Here’s how I built my site in no time:
1. Choose the Right Plan I went with the Premium Shared Hosting plan—perfect for getting started without breaking the bank. It offers plenty of resources to handle growing traffic.
2. Quick Setup In just a few clicks, WordPress was automatically installed thanks to the one-click installer. No more wrestling with FTP files!
3. Customize & Launch I picked a responsive theme, added my products/posts, and was live in under an hour. The free SSL certificate and included domain saved me extra fees.
💡 Pro Tip: Enable LiteSpeed caching in your dashboard to optimize speed and boost your SEO.
“In just 24 hours, I saw my first sales come in thanks to a fast and reliable landing page.”
🔗 Take advantage of Hostinger’s offer starting at €1.99/month by clicking here: https://www.hostinger.com/referral?REFERRALCODE=1ABDELOUAHD35
0 notes
Text
TicketGo Nulled Script 4.2.2

Download TicketGo Nulled Script for Free – The Ultimate Support Ticket System If you're looking for a reliable, efficient, and feature-rich support ticket management solution, the TicketGo Nulled Script is the perfect choice for your business or project. Whether you're running a digital agency, a tech startup, or an eCommerce store, TicketGo empowers you to manage customer support like a pro—without spending a dime. Now available for free download, this nulled script opens the door to premium features without the premium price tag. What is TicketGo Nulled Script? The TicketGo Nulled Script is a robust, fully-featured PHP-based support ticket system designed to streamline and automate your customer service workflows. It enables businesses to handle support queries, assign agents, prioritize tickets, and track progress through an intuitive dashboard. Best of all, you can download this premium-grade tool for free and integrate it easily into your existing system. Why Choose TicketGo Nulled Script? Support ticket systems are crucial for any service-based business. With the TicketGo Nulled Script, you get a polished, powerful backend with clean code, easy installation, and rich customization options. It’s a complete support system solution at zero cost—perfect for startups and developers who need professional tools without breaking the bank. Technical Specifications Language: PHP Database: MySQL Framework: Laravel Responsive Design: Fully mobile-optimized License: Nulled (No license required) Key Features & Benefits 1. Advanced Ticket Management Organize and manage support tickets with ease using the integrated dashboard. The system supports ticket categorization, priority tagging, and real-time updates to ensure efficient resolution. 2. Multi-Agent Support Assign different agents to specific tickets or departments. With the TicketGo Nulled Script, collaboration is seamless, boosting your team’s productivity. 3. Customizable Email Notifications Keep your users informed with automatic email alerts for ticket updates, agent responses, and ticket closures. You can customize templates to match your brand voice. 4. User-Friendly Interface The intuitive, clean design ensures a smooth user experience for both customers and agents. No steep learning curve—just plug and play. 5. Analytics & Reporting Gain insight into your support operations with built-in analytics. Monitor agent performance, ticket trends, and response times directly from the dashboard. Common Use Cases Freelancers: Manage client queries and feedback efficiently. Startups: Deliver professional-grade customer support from day one. eCommerce Platforms: Handle order-related issues and customer complaints systematically. Software Developers: Track bugs and feature requests from users. How to Install TicketGo Nulled Script Download the TicketGo Nulled Script zip file from our website. Extract the files and upload them to your server directory using FTP or cPanel. Create a MySQL database and import the included SQL file. Configure your .env file with the correct database credentials. Access your domain in the browser to complete the setup wizard. Frequently Asked Questions (FAQs) Is TicketGo Nulled Script safe to use? Yes, the version provided has been tested for malware and backdoors. However, it's always recommended to scan any file before installation. Do I need a license to use TicketGo? No. The TicketGo Nulled Script available on our platform is fully nulled and does not require any license for use. Can I use it for commercial projects? Absolutely! This script is ideal for both personal and commercial projects. Just install, configure, and start managing tickets professionally. Where can I download other helpful tools? We offer a wide range of nulled plugins to support your development and design needs. Looking for top-tier WordPress security? Check out the powerful iThemes Security Pro NULLED for complete protection of your WordPress site—absolutely free!
Conclusion With the TicketGo , you can build a high-functioning, client-friendly support system without the high costs. It’s the ideal solution for anyone seeking a streamlined, efficient way to handle support tickets while enjoying full control over the features and appearance. Download now and elevate your support game—no licenses, no subscriptions, just pure performance.
0 notes
Text

How to Set Up Your Local Development Environment for WordPress
Setting up a local development environment is one of the best ways to experiment with and build WordPress websites efficiently. It offers you a safe space to test themes, plugins, and updates before applying changes to a live site. Whether you’re a beginner or an experienced developer, having a local environment is essential in streamlining your workflow and minimizing website downtime.
Before we dive into the technical steps, it’s worth mentioning the benefits of WordPress for your business website. WordPress offers unmatched flexibility, scalability, and user-friendliness, making it an ideal platform for businesses of all sizes. When paired with a solid local development setup, WordPress becomes even more powerful in enabling fast and secure site builds.
Step 1: Choose Your Local Development Tool
There are several local development tools available that cater specifically to WordPress users:
Local by Flywheel (now Local WP): Extremely beginner-friendly with features like SSL support and one-click WordPress installs.
XAMPP: A more general-purpose tool offering Apache, MySQL, PHP, and Perl support.
MAMP: Ideal for macOS users.
DevKinsta: Built by Kinsta, it offers seamless WordPress development and staging capabilities.
Choose the one that suits your OS and comfort level.
Step 2: Install WordPress Locally
Once you’ve chosen your tool:
Install the software and launch it.
Create a new WordPress site through the interface.
Set up your site name, username, password, and email.
After setup, you’ll get access to your WordPress dashboard locally, allowing you to install themes, plugins, and begin your customizations.
Step 3: Configure Your Development Environment
To ensure an efficient workflow, consider these configurations:
Enable Debug Mode: Helps in identifying PHP errors.
Use Version Control (e.g., Git): Keeps your changes tracked and manageable.
Database Access: Tools like phpMyAdmin help manage your WordPress database locally.
If your project requires dynamic functionality, leveraging PHP Development Services during the setup phase can ensure custom features are implemented correctly from the beginning.
Step 4: Customize Themes and Plugins Safely
With your local environment set up, now's the time to begin theme development or customization. You can safely create or modify a child theme, experiment with new plugins, and write custom code without any risk of affecting your live site.
For those unfamiliar with theme structures or WordPress standards, it’s often wise to hire a professional WordPress developer who understands best practices and can ensure clean, maintainable code.
Step 5: Syncing to a Live Server
After building and testing your site locally, you'll eventually want to push it live. Popular methods include:
Using a plugin like Duplicator or All-in-One WP Migration
Manual migration via FTP and phpMyAdmin
Using version-controlled deployment tools
Syncing should always be done carefully to avoid overwriting crucial data. Regular backups and testing are essential.
Step 6: Maintain Your WordPress Site Post-Launch
Launching your website is only the beginning. Ongoing updates, security patches, and performance optimization are critical for long-term success. Enlisting website maintenance services ensures your site remains fast, secure, and up-to-date.
Services can include:
Core, plugin, and theme updates
Malware scans and security hardening
Site performance monitoring
Regular backups
Final Thoughts
A local WordPress development environment not only speeds up your development process but also protects your live website from unintended changes and errors. With tools and strategies now more accessible than ever, there's no reason not to use one.From learning the basics to running advanced builds, setting up locally gives you the confidence and space to grow your WordPress skills. And if you want to see real-world examples or follow along with tips and tricks I share, feel free to check out my work on Instagram for practical inspiration.
0 notes
Text
How to Safely Delete Your WordPress Website
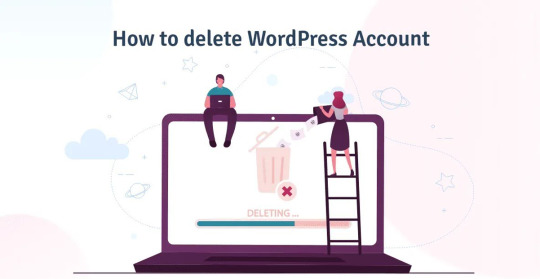
Deleting a WordPress website can be necessary for various reasons, whether you want to start fresh or no longer need the site. This guide will show you how to do it safely and effectively. Additionally, you might want to read our post on How to Delete WordPress Account to learn more about managing your WordPress setup.
Safe Steps to Delete Your WordPress Website
Back Up Your Website: It’s always smart to back up your site before deleting it. Save your content, plugins, themes, and any other important data you might need later.
Remove WordPress Files: Log into your hosting account and delete the WordPress files using an FTP client or your hosting provider’s file manager.
Delete Your Database: After deleting the files, make sure to delete the WordPress database. This can be done through phpMyAdmin, ensuring that all your data is removed.
Cancel Hosting and Domain Services: Don’t forget to cancel your hosting plan and delete the domain if it's no longer required. It’s important to know how to delete a domain on WordPress if you registered it through WordPress.com.
Remove Traces from Search Engines: After deleting your site, you may need to remove it from search engine results. Use Google Search Console to submit a removal request.
Cancel Subscriptions and Request Refunds: Make sure to cancel subscriptions and request refunds for any paid services associated with your WordPress site.
Deleting WordPress on Mobile
For those who need to know how to delete a WordPress account on your phone, the process is similar to what you’d do on a desktop. Access your account via the WordPress mobile app or a mobile browser and follow the steps to delete your site.
Final Remarks
Whether you're looking to understand how to delete a WordPress account and start over or just want to permanently remove a site, following these steps will help you do so safely. Always back up your data before beginning the process, and ensure that all steps are completed. For further assistance, feel free to explore our other resources or contact support.
0 notes
Text
How can I migrate my website to a new hosting provider
Migrating your website to a new hosting provider might seem like a daunting task, but with careful planning and execution, it can be a smooth and relatively stress-free process.
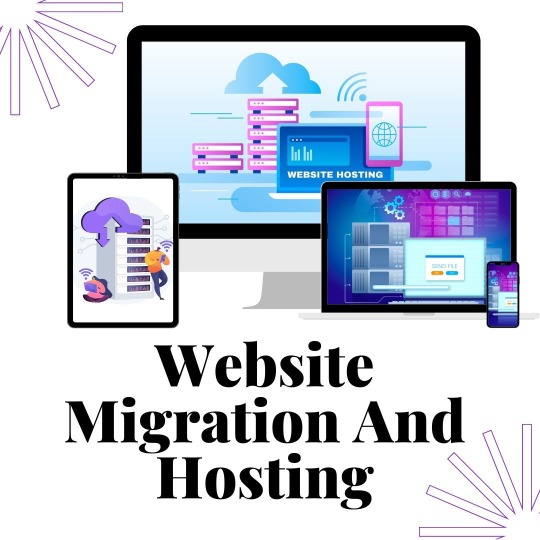
Here’s a step-by-step guide on how to migrate your website to a new hosting provider:
1. Evaluate Current Hosting and Needs
Before starting the migration process, evaluate current hosting setup and requirements. Understand the resources of the website uses, such as disk space, bandwidth, databases, and specific software versions. This will help you choose a new hosting provider that meets your needs. Additionally, note any issues you’ve encountered with your current host, such as downtime or poor customer support, to ensure your new host addresses these concerns.
2. Choose a New Hosting Provider
Research and select a new hosting provider based on your needs. Consider factors like uptime reliability, customer support, scalability, security features, and cost. Popular hosting providers include Bluehost, SiteGround, and HostGator, each offering various plans tailored to different types of websites.
3. Backup Your Website
Creating a complete backup of your website is a critical step before migration. This includes all files, databases, and configurations. You can use tools like cPanel’s backup feature, or plugins like UpdraftPlus for WordPress sites, to create backups. Ensure you have multiple copies stored securely on different devices or cloud storage.
4. Set Up Your New Hosting Environment
Once you have chosen your new host, set up your new hosting environment. This involves creating your domain and setting up your website files and databases. Most hosting providers offer a cPanel or similar control panel that makes this process straightforward. Make sure to replicate your old hosting environment as closely as possible to avoid compatibility issues.
5. Transfer Files and Databases
Next, transfer your website files and databases to the new host. You can use an FTP client like FileZilla to upload your files. For databases, you can use phpMyAdmin to export your database from the old host and import it into the new host. Some hosting providers also offer automated migration tools to simplify this process.
6. Update DNS Settings
After transferring your files and databases, update your DNS settings to point to the new hosting provider. This involves changing the nameservers for your domain to those provided by your new host. This change can usually be made through your domain registrar’s control panel. DNS propagation can take anywhere from a few hours to 48 hours, so be prepared for a short period where your website may not be accessible globally.
7. Test Your Website
Before making your new site live, thoroughly test it to ensure everything works correctly. Check all pages, links, forms, and any interactive features. Verify that your database connections are functioning properly and that your website appears as expected. This step is crucial to identify any issues that might have arisen during the transfer.
8. Update Configurations and Settings
Ensure that all configurations and settings are updated to reflect the new hosting environment. This includes updating any hardcoded URLs, database connection strings, and configuration files. For WordPress sites, you might need to update the wp-config.php file to reflect the new database credentials.
9. Monitor Your Website
Once your website is live on the new host, monitor it closely for any issues. Pay attention to website performance, uptime, and any error messages. Use monitoring tools to track your website’s health and address any issues promptly. Communicate with your new hosting provider’s support team if you encounter any problems.
10. Cancel Old Hosting Account
After ensuring that your website is functioning correctly on the new host, you can cancel your old hosting account. Before doing so, make sure that you have no residual files or databases left that you might need. Confirm that your domain is fully propagated to the new host and that there is no remaining dependency on the old host.
Additional Tips
Communicate with Both Hosts: Keep open communication with both your old and new hosting providers. They can offer valuable assistance and troubleshoot any issues that arise during the migration process.
Plan for Downtime: Schedule the migration during a low-traffic period to minimize the impact of any potential downtime on your visitors.
Secure Your Data: Ensure all data transfers are secure, using secure protocols like SFTP and HTTPS to prevent data breaches during the migration.
Use Migration Services: Many hosting providers offer migration services, sometimes for free. These services can simplify the process and reduce the risk of errors.
Migrating your website to a new hosting provider can significantly improve your site’s performance, security, and reliability. By following these steps and taking a methodical approach, you can ensure a smooth transition and continued success for your website.
The topic is just for information or knowledge purpose. If anybody in need of website development and hosting please visit at top web design company in Bangalore
#best website designers in bangalore#best website company in bangalore#website development services in bangalore#web hosting services in bangalore#web hosting company in bangalore#tech blog#cloud#hosting#website migration
0 notes
Text
How to Create a WordPress Website from Scratch
Building a website from scratch can seem like a daunting task, especially if you're new to web development. Fortunately, WordPress, one of the most popular content management systems (CMS), makes the process straightforward and accessible, even for beginners. In this guide, we'll walk you through the steps to create a professional WordPress website from scratch. Whether you're setting up a blog, an online store, or a portfolio site, this step-by-step guide will help you launch your WordPress websites efficiently.

Step 1: Define Your Website’s Purpose
Before diving into the technical aspects, it’s crucial to define the purpose of your website. Are you creating a blog, an online store, a business site, or a portfolio? Understanding your website’s goals will help you make informed decisions throughout the setup process, from choosing the right themes and plugins to organizing your content effectively.
Step 2: Choose a Domain Name and Hosting
Domain Name
Your domain name is your website's address on the internet (e.g., www.yourwebsite.com). It should be unique, easy to remember, and relevant to your site's content. Tools like Namecheap or GoDaddy can help you check the availability of your desired domain name and purchase it.
Hosting Provider
A hosting provider is where your website files are stored and accessed by visitors. Reliable hosting is crucial for your website's performance and security. Popular hosting providers include:
Bluehost: Great for beginners, offering easy WordPress integration.
SiteGround: Known for excellent customer service and performance.
WP Engine: Specializes in WordPress hosting with robust features.
Sign up for a hosting plan that suits your needs. Many hosts offer one-click WordPress installation, simplifying the setup process.
Step 3: Install WordPress
Most hosting providers offer easy, one-click WordPress installations. If your provider doesn’t, follow these steps:
Download WordPress from the official website (wordpress.org).
Upload the WordPress files to your hosting account using an FTP client like FileZilla.
Create a MySQL database via your hosting control panel.
Run the WordPress installation script by navigating to your domain name.
During installation, you'll need to enter your database details and create an admin account. Keep this information secure, as it grants full access to your website.
Step 4: Choose and Install a Theme
WordPress themes dictate your website's appearance and layout. The WordPress repository offers thousands of free themes, and there are premium themes available from marketplaces like ThemeForest.
Installing a Theme
Navigate to Appearance > Themes in your WordPress dashboard.
Click Add New to browse free themes from the WordPress repository.
Search for a theme that fits your website’s purpose, preview it, and click Install.
Activate the theme to apply it to your website.
Premium themes usually require downloading a zip file from the marketplace and uploading it via the Upload Theme button in the Themes section.
Step 5: Customize Your Theme
Once your theme is activated, you can customize it to match your branding and style. Navigate to Appearance > Customize to access the theme customizer. Here, you can:
Upload your logo
Modify colors and fonts
Set up your homepage and other pages
Adjust header and footer settings
Themes often come with their own set of customization options, so explore the settings to make your website unique.
Step 6: Install Essential Plugins
Plugins extend the functionality of your WordPress website. Here are some essential plugins to consider:
Yoast SEO: Helps optimize your website for search engines.
Contact Form 7: Allows you to create and manage contact forms.
WooCommerce: Turns your site into an online store.
Jetpack: Offers security, performance, and site management features.
Wordfence Security: Protects your site from malware and threats.
To install a plugin:
Navigate to Plugins > Add New in your WordPress dashboard.
Search for the plugin you need.
Click Install Now, then Activate once the installation is complete.
Step 7: Create Key Pages and Content
Start creating the essential pages for your website. Common pages include:
Home Page: The main landing page that welcomes visitors.
About Page: Provides information about you or your business.
Contact Page: Allows visitors to get in touch with you.
Blog Page: Displays your blog posts if you’re running a blog.
Shop Page: Showcases your products if you’re running an e-commerce site.
To create a page:
Navigate to Pages > Add New in your dashboard.
Enter a title and content for the page.
Click Publish to make the page live.
Use the built-in WordPress editor (Gutenberg) to add text, images, and other media to your pages.
Step 8: Configure Your Site Settings
Customize your WordPress settings to enhance your site’s performance and user experience. Key settings include:
General Settings: Set your site title, tagline, and timezone.
Reading Settings: Choose what your homepage displays (static page or latest posts).
Permalinks: Configure how your URLs are structured for SEO. Navigate to Settings > Permalinks and select the Post name option for a cleaner URL structure.
Step 9: Optimize for SEO
Search engine optimization (SEO) is crucial for driving traffic to your website. Here are some basic SEO practices:
Install an SEO plugin like Yoast SEO to guide you through on-page optimization.
Use keywords relevant to your content in titles, headers, and body text.
Optimize images by using descriptive filenames and alt text.
Create an XML sitemap to help search engines index your site (Yoast SEO can generate this for you).
Submit your sitemap to Google Search Console to monitor your site’s presence in Google search results.
Step 10: Secure Your Website
Website security is essential to protect your site from hackers and malware. Follow these steps to secure your WordPress site:
Use strong passwords for all user accounts.
Keep WordPress, themes, and plugins updated to the latest versions.
Install a security plugin like Wordfence or Sucuri.
Enable SSL to encrypt data between your site and visitors. Most hosting providers offer free SSL certificates.
Backup your site regularly using plugins like UpdraftPlus to prevent data loss.
Step 11: Launch Your Website
After you've set up and customized your WordPress website, it's time to launch. Before going live, perform a thorough review:
Test all links and forms to ensure they work correctly.
Preview your site on different devices to check for responsiveness.
Check for any errors or inconsistencies in design and content.
Once everything is in order, you can officially launch your website. Share it with your audience through social media, email newsletters, and other marketing channels.
Conclusion
Creating a WordPress websites from scratch is a manageable task, even for beginners, thanks to the platform's user-friendly interface and extensive resources. By following this step-by-step guide from VAW Agency, you can launch a professional and functional website that meets your needs and engages your audience. Remember, the key to a successful website is continuous improvement, so keep updating your content, optimizing for SEO, and enhancing your site's features as your needs evolve. Happy website building!
0 notes
Text
Understanding the Essence of Plesk Hosting: A Comprehensive Guide
16.1.2024
In the vast landscape of web hosting solutions, Plesk Hosting emerges as a powerful and user-friendly option, providing a robust platform for website creation, management, and security. In this article, we will delve into the fundamentals of Plesk Hosting, exploring its functionalities, significance for businesses, and the numerous benefits it offers.
What is Plesk Hosting?
Plesk Hosting is a Linux-based hosting control panel that serves as a centralized hub for efficiently managing websites and applications in the cloud. It is specifically designed to simplify complex tasks associated with web hosting, offering an intuitive interface and a comprehensive set of tools. With Plesk, users can navigate the intricacies of website management with ease, making it an ideal solution for both beginners and seasoned web administrators.
How Plesk Hosting Works
At its core, Plesk Hosting streamlines the process of hosting multiple websites by providing a unified and user-friendly interface. The workings of Plesk involve a systematic approach to website management, offering tools that cover everything from domain setup to security configurations.
Domain Management:
Plesk allows users to effortlessly host and manage multiple websites through its intuitive domain management features. The platform simplifies tasks like domain registration, DNS configuration, and subdomain creation, providing a seamless experience for users with varying levels of expertise.
Application Deployment:
One notable feature of Plesk Hosting is its support for various applications and content management systems (CMS). Users can deploy popular applications like WordPress, Joomla, and Drupal with just a few clicks, eliminating the need for manual installations. This not only saves time but also ensures a smooth and efficient process.
Security Enhancements:
Plesk Hosting prioritizes the security of hosted websites. It offers tools for implementing SSL certificates, securing FTP access, and configuring firewalls. Regular security updates and monitoring contribute to a robust defense against potential threats, making Plesk Hosting a reliable choice for safeguarding online assets.
Importance of Plesk Hosting for Businesses
In the competitive online landscape, businesses need a hosting solution that not only meets their technical requirements but also enhances overall efficiency. Plesk Hosting holds significant importance for businesses, irrespective of their size or industry. Let's explore some key reasons why businesses should consider adopting Plesk Hosting.
User-Friendly Interface:
One of the primary advantages of Plesk Hosting is its user-friendly interface. Businesses can save valuable time and resources by choosing a hosting solution that doesn't require a steep learning curve. With Plesk, even individuals without extensive technical knowledge can efficiently manage and update their websites.
Scalability:
Businesses evolve, and so do their website needs. Plesk Hosting provides scalability, allowing businesses to expand their online presence seamlessly. Whether it's adding new domains, scaling up server resources, or incorporating additional applications, Plesk adapts to the changing requirements of a growing business.
Centralized Management:
Plesk acts as a centralized hub for website management, enabling businesses to oversee all aspects of their online presence in one place. From domain management to email configuration, businesses can streamline their operations and reduce the complexities associated with multiple hosting solutions.
Collaboration and Team Management:
For businesses with multiple team members involved in website management, Plesk offers collaborative features. Access controls and permissions can be customized, allowing teams to work together efficiently without compromising security. This collaborative approach is particularly beneficial for agencies and businesses with distributed teams.
Benefits of Plesk Hosting
Now that we've explored the importance of Plesk Hosting for businesses, let's delve into the specific benefits that make this hosting solution stand out in the crowded market.
1. Intuitive Dashboard:
Plesk Hosting features a visually appealing and intuitive dashboard, providing users with a clear overview of their hosting environment. Navigating through various settings and options is seamless, contributing to a positive user experience.
2. Time-Efficient Setup:
Setting up a website can be a time-consuming process, especially for those new to web hosting. Plesk Hosting simplifies this process with a user-friendly setup wizard, allowing users to configure their hosting environment quickly and efficiently. This time-saving feature is particularly valuable for individuals and businesses looking to launch their websites promptly.
3. Application Support:
The support for various applications and content management systems is a significant advantage of Plesk Hosting. Users can easily deploy and manage popular applications, plugins, and extensions, enhancing the functionality of their websites without the need for extensive technical knowledge.
4. Automated Backups:
Data loss can be a major setback for any website. Plesk Hosting addresses this concern by offering automated backup solutions. Users can schedule regular backups of their websites and restore them with ease in case of unexpected events, ensuring the safety and integrity of their online data.
5. Enhanced Security Features:
Security is a top priority in the online world, and Plesk Hosting delivers on this front. With features like SSL certificate management, firewall configurations, and malware scanning, Plesk provides a secure hosting environment, protecting websites and sensitive data from potential threats.
6. Comprehensive Email Management:
For businesses relying heavily on email communication, Plesk Hosting offers robust email management tools. Users can create and manage email accounts, set up mailing lists, and configure spam filters, contributing to efficient communication and a professional online presence.
Why Choose Plesk Hosting?
In a market saturated with various hosting solutions, choosing the right one for your needs is crucial. Plesk Hosting stands out for several compelling reasons, making it a preferred choice for individuals, businesses, and web developers.
1. User-Friendly Interface:
Plesk Hosting's intuitive interface is designed with the end-user in mind. Whether you are a seasoned web developer or a business owner with limited technical expertise, Plesk ensures that managing your hosting environment is a straightforward and stress-free experience.
2. Versatility in Application Support:
The ability to support a wide range of applications, including popular content management systems, gives Plesk Hosting a competitive edge. This versatility allows users to customize and enhance the functionality of their websites without the need for intricate coding or technical know-how.
3. Security Focus:
Security is paramount in the digital landscape, and Plesk Hosting recognizes this by providing robust security features. From SSL certificate management to proactive malware scanning, Plesk takes proactive measures to safeguard websites and sensitive data hosted on its platform.
4. Time and Resource Efficiency:
The time-efficient setup process, automated backups, and streamlined management tools contribute to overall efficiency. Plesk Hosting allows users to focus on their core objectives without getting bogged down by the complexities of hosting administration, saving both time and resources.
5. Scalability for Growing Needs:
Businesses and websites evolve, and Plesk Hosting is prepared to grow with them. The scalability of Plesk ensures that users can expand their online presence seamlessly, adding new domains, scaling up resources, and incorporating additional features as needed.
6. Collaborative Capabilities:
For businesses and teams, Plesk Hosting provides collaborative features that facilitate teamwork without compromising security. Tailored access controls and permissions enable efficient collaboration among team members, streamlining website management processes.
Conclusion
In conclusion, Plesk Hosting emerges as a versatile and reliable solution for individuals, businesses, and web developers seeking an efficient and user-friendly hosting platform. Its intuitive interface, robust security.
1 note
·
View note
Text
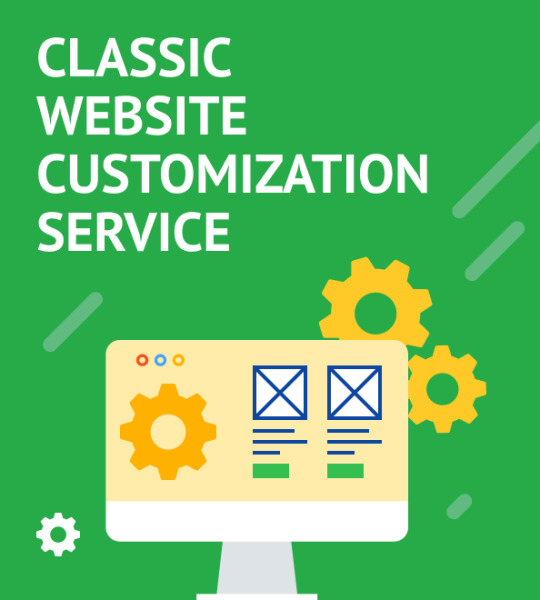
Classic Website Customization Service
You can add this service to your basket at the bottom of the page. Just scroll to the end of the product description. Supported CMS Platforms: - WordPress - Joomla - HTML5/CSS3 Website Key Services I Offer: Fast Theme Installation on Your Web Host Don't let technicalities slow you down. I will swiftly install your chosen theme on your web host, ensuring a seamless launch. Publishing 10 Captivating Blog Posts Engage your audience with fresh, relevant content. I'll schedule 10 compelling blog posts to keep your site buzzing with activity. Website Personalisation with Branded Logos and Colour Schemes Make your mark with a unique identity. I'll infuse your website with branded logos and tailor the colour scheme to match your vision. Contact Forms and Maps Setup Stay connected with your audience. I will set up contact forms and integrate maps, enhancing user interaction. Speedy Turnaround Experience the magic within 7 to 10 business days*, and watch your website transform before your eyes. What's Included in My Classic Website Customization Service: Theme Installation on Web Hosting Get started swiftly by providing us with your hosting and FTP access details or let us assist you in selecting the best hosting solution. Hosting Setup to Match Your Theme I'll ensure your hosting perfectly complements your chosen theme, creating a seamless user experience. Default Plugin Activation and Setup Activate essential plugins to supercharge your website's functionality, ensuring a smooth operation. Demo Content Replacement Your content takes centre stage. I'll replace the demo content with your provided text and images, filling up to five web pages and ten blog posts. Theme Customization I'll add your logo and personalize the colour scheme to align with your brand's identity. Website Contact Details Setup Enhance user engagement with professionally designed contact forms and optional map integration. 3 Revisions Enjoy peace of mind with three minor revisions, valid for 30 days after project delivery. How My Classic Website Customization Service Works: Step 1: Collecting Information 🕒 from15 mins Upon confirming your order, I will reach out to gather the necessary details. I'll need access to your hosting account and the content for your pages and blog posts. I will be your guiding light throughout the process. Step 2: Completing Classic Website Customization 🕒 7 - 10 Business Days* Once I have all the required data, I'll install and customize your chosen template, keeping you in the loop at every stage. Step 3: Reviewing & Finishing Up 🕒 from 15 mins After customization, you can review and approve the results. Two free revisions are at your disposal if you wish to make changes. I'll provide you with login details to access the admin panel, allowing you to take control of your website. To Provide Classic Website Customization Service, I Need: - cPanel plus FTP and MySQL access to your hosting - Logo (preferably in .SVG) - Colour preferences - Content (images and texts) for pages and blog posts - Detailed content placement instructions 4 Top Reasons to Try Classic Website Customization Service: - If you're new to CMS platforms and hosting servers, fear not. I will handle the technicalities, delivering a fully operational website within days, not weeks. - The process is straightforward: provide hosting access, send us your content and instructions, and watch your website come to life in 7 - 10 business days.* - This Classic Website Customization Service encompasses theme installation, contact form activation, logo integration, content creation, and SEO optimization to boost your search engine ranking. - You'll have me by your side to ensure a smooth journey. If you don't have hosting, I can offer you hosting at a great price or if you prefer, I can assist you in selecting the right one. Please Note: - The service covers one website. - Advanced coding and layout modifications can be arranged for an additional fee. - Timely provision of requested information is essential to meet project deadlines. - Project kick-off or delivery time may vary slightly due to workload or unforeseen circumstances. - Three minor revisions are included, valid for 30 days after project delivery. Classic Website Customization FAQ: What does Classic Website Customization Service include? This service encompasses template installation, logo addition, colour scheme customization, contact form activation, and content creation for up to 5 pages and 10 blog posts. How long will it take to complete Classic Website Customization Service? Expect completion within 7 to 10 business days, contingent on timely content provision. Three free revisions are included. Can you deliver faster? Yes, for an additional fee, I can expedite your site's launch. Contact me to discuss your options. Can I order if I don't have all the content ready? Absolutely, you can provide content at your own pace, and I'll start when everything is ready. Need help with content? Ask me about my Content Writing Service. Will you install a template on my hosting? Yes, I can install it on existing hosting or help you select and register a compatible one if needed. Do I have to check my hosting compatibility? Yes, ensuring your hosting matches template requirements is crucial. I can guide you in making the right choice. What if I need more content pages? I offer additional customisation services for a fee. Contact me for details. Can you customise my online store? This service doesn't cover store configuration. Ask about the All-in-One Store Setup for eCommerce themes. When will you contact me? After payment, I will guide you on content submission, offering various options. What if I'm not satisfied with the final result? Three minor revisions are available for 30 days after project delivery to ensure your satisfaction. Can you help me migrate from another platform to WordPress? Certainly, I can migrate content and add functionality from other CMS platforms to WordPress. Reach out to discuss the details. * Timeline assumes that the client already has all the information and content available when the project kicks off. Delays in receiving any of the required information and content will inevitably delay the project beyond my control and for which I cannot be held responsible. Read the full article
0 notes
Text
ChatPion Nulled Script 9.1.1

Download ChatPion Nulled Script – Unlock the Power of Automated Messenger Marketing Are you looking for an all-in-one messenger marketing solution that transforms your digital outreach effortlessly? Look no further. ChatPion Nulled Script is the ultimate automation tool for Facebook and Instagram marketing, giving you total control over engagement, lead generation, and conversion—all for free. This fully unlocked version empowers you with features previously locked behind premium access, now available at zero cost from our platform. What Is ChatPion Script? ChatPion Script is the premium, nulled edition of the highly rated XeroChat marketing software. Designed for digital marketers, social media managers, and small business owners, ChatPion offers a comprehensive suite of tools to automate and streamline Facebook Messenger and Instagram DM campaigns. From auto-replies to comment automation, live chat integration, and powerful analytics, ChatPion brings enterprise-grade marketing features to your fingertips. The nulled version removes all limitations, giving you full, unrestricted access to every advanced module without paying a dime. Technical Specifications Script Name: ChatPion Nulled Script Version: Latest stable release Compatibility: PHP 7.4+, MySQL 5.6+, Apache/Nginx Framework: CodeIgniter-based Database: MySQL Installation Type: Self-hosted Outstanding Features and Benefits Facebook & Instagram Automation: Send messages, replies, and campaigns directly through integrated APIs. Visual Flow Builder: Design intuitive customer journeys using drag-and-drop functionality. Auto Reply & Comment Bot: Keep your audience engaged with smart, real-time responses. Email & SMS Marketing: Integrated campaigns beyond Messenger for multi-channel success. Ecommerce Integration: Sell products directly via Messenger with built-in store support. Advanced Analytics: Track campaign performance and user behavior with detailed insights. Ideal Use Cases for ChatPion Nulled Script The ChatPion Nulled Script is perfect for: Freelancers offering social media management services. Marketing agencies scaling operations without increasing overhead. Small to medium-sized businesses seeking affordable automation tools. Ecommerce sellers aiming to boost conversions through Messenger. How to Install ChatPion Nulled Script Download the full package of ChatPion from our site. Upload the files to your web server using FTP or cPanel. Create a new MySQL database and configure your database settings in the config.php file. Run the installation wizard via yourdomain.com/install and complete the setup process. Login with the provided admin credentials and begin configuring your chatbot, campaigns, and flows. Note: Make sure your hosting meets the PHP and MySQL requirements to ensure seamless installation. Frequently Asked Questions Is ChatPion Nulled Script safe to use? Yes, the version we provide is scanned and verified for safety. While it’s always recommended to test on a staging environment first, our nulled scripts are sourced responsibly and kept updated. What features are included in the nulled version? You get full access to all premium modules including Messenger automation, visual flow builder, email/SMS campaigns, ecommerce features, and more. Nothing is locked or restricted. Can I use this on multiple domains? Absolutely. The ChatPion Nulled Script is not license-bound, which means you can deploy it on as many domains or projects as needed. Where can I find more nulled resources like this? We offer a vast collection of nulled WordPress themes and plugins that you can download without paying premium fees. Are there alternatives to ChatPion? Yes, there are several messenger automation tools available, but most are costly. One excellent nulled alternative is Porto NULLED, a premium theme adapted for versatile usage. Final Thoughts The ChatPion Nulled Script stands out as one of the most powerful and cost-effective solutions for messenger marketing in today’s competitive digital landscape.
By downloading the nulled version from our platform, you get premium features, complete control, and endless automation possibilities—all without spending a cent. Boost your marketing strategy today with ChatPion and experience the freedom of unlimited automation, growth, and innovation.
0 notes
Text
How to Reclaim Control of Your Domain and Website From Your Provider?
So you’re looking to upgrade your website, hire an SEO company, or simply want to keep your property secured in your hands. Whatever the reason is, you likely came across an issue when reclaiming your domain name and website. But don’t worry, we’ll break down everything you need to know about how to get your website’s ownership back in your hands.
Read the full article: “How to Reclaim Control of Your Domain and Website From Your Provider?”
The Big “IF”
IF you bought a domain you own it, unless of course, you signed otherwise. Now, this is not legal advice, but almost all website agencies will clearly state that they own the domain or that you own the domain. At JCSURGE, we clearly state that the domain is property of the client. Even if we buy and or host their domain, if one of our customers requests a transfer we will comply.
Identity Who Has Control of Your Website and Domain
This is an obvious point to most people, but there have been many times where a local business owner tells us they own the website but don’t own the domain or vice versa.
Start with your domain
Your domain is what your customers and prospects type in to find your business. It’s what Google uses to rank your business against your competitors. So above all, it’s the most important asset you have when it comes to your digital marketing.
Getting your login details
Most of the time when we speak with a local business owner and find this information for them, they recall registering with that company.
The next step is to get your login details. For this you will need two things (at least): a username, and password.
What if I hired someone else to buy my website?
We had this issue once with a customer, actually several times, and it’s always a challenge. But you’re going to have to get ahold of that person or their team. By using the lookup tool mentioned above you can clearly state the company they bought the domain from.
Transferring Your Website’s Content
Before beginning this process you’ll want to get a backup of your website. You can do this a number of ways. The first option is to ask your current provider to give you a backup of your current website. Most of the time they will be happy to give you a backup or at least give you FTP access so you or a developer can download the contents independently.
Transferring Your Domain to Your Own Hands From Your Previous Provider
Please note that if your domain was set up within 60 days, you CANNOT transfer it. This is according to ICANN’s policy of domain transfer.
Once your previous web designer or marketing agency is willing to release the domain name into your custody, you’ll need to prepare a transfer.
Doing this is different from website to website. However here is the basic principle:
You’re going to have to request a transfer (most platforms like Namecheap and GoDaddy have their own in-depth articles on how to do this). To do this, contact your previous provider and their team, and ask them to ‘unlock’ your domain.
You will need to also request the domain authorization code from them in order to continue. This is a code that verifies the ownership of the domain. You will need it when you request a transfer.
Because there are so many domain registrar companies, it would take forever for us to walk you through each one and their steps. Here are the top 5 most common registrar’s and their domain transfer process.
Namecheap
GoDaddy
Hostinger
Host Gator
Sitegounrd
You may choose to transfer the domain to a different company in which case you should always double-check with their policies and process.
Getting Your Website Hosted
The next step is to get your website on a hosting platform. While some companies may have a free hosting option available, many will require you to do a bit of technical setup with your domain, some will automatically host your website and provide you with a builder (e.g., Wix).
At JCSURGE we typically separate our domains from hosting companies. We don’t like to rely on one company too much. We use Hostinger to host our websites and Namecheap to manage our domains.
Transferring Nameservers
Once you have your domain in your hands, whether you’re using Namecheap, GoDaddy, or any other registrar, you will want to point your domain’s nameservers to the address of your hosting provider. Different hosting companies will have different nameservers. Some will require 2, others will require you to enter up to 4. Check with your hosting company to find out exactly what nameservers you need to enter on your domain.
Uploading and Unloading Your Website
If you have a backup file of your website, load it up using Filezilla, or hire a developer to do this task for you. It should take no more than a day for the majority of local business sites.
Looking to Get a New Website?
If you’re looking to get a new website for your local business consider hiring our SEO and Web Design team at JCSURGE. We provide local business owners with unbeatable search engine optimization and website redesign service. We’ll help you regain ownership of your website as we have done for many business owners all across the United States.
Contact us today for a free quote & video audit explaining the process.
JCSURGE LLC 401 E 74th St Unit#1B New York, NY 10021 (917) 747-4234 [email protected]
Social Links: Facebook Twitter Instagram
External Links: WordPress WIX Weebly Tumblr Jimdo Blogspot Site123
1 note
·
View note
Text
How to Choose the best UK WordPress Hosting For your website
It is not easy to choose the best WordPress hosting service for your business website. It is a decision that you need to invest some time in because the performance and service of your hosting provider has a direct impact on your sales, SEO, website’s performance and uptime.
WordPress managed Website hosting
Some hosting providers such provide WordPress managed hosting services; they are built specially to host WordPress websites and blogs. Getting started with them is very easy and they have a dedicated WordPress support team. This is helpful, especially if you do not want to get bogged down in the technicalities of your website: should you encounter an issue with your WordPress they will look into it for you.
Also, many managed WordPress hosting services also offer additional services, such as caching systems, CDNs, WordPress auto updates, WordPress backups etc. Another out of the box feature most hosting providers have is the staging site. A staging website allows you to make changes to the website and preview them before published live.
Self-managed WordPress hosting
Self-managed hosting is the other end of the spectrum. You rent the server or hosting space and you have to install and setup everything yourself. It depends on what time of self-managed hosting service you choose, however you might have to configure the web server, MySQL database, mail server, FTP, SSH and all the other services yourself. With self-managed hosting you also have to take care of the server’s operating system, updates and security.
In case of self-managed hosting, the provider only supports you with issues related to your server package and connection. They do not support you with any issues you might have with your WordPress website.
Shared or dedicated WordPress hosting
Another decision you have to make before researching which is the best hosting provider for your WordPress website, is whether you need shared or dedicated hosting. In this section we explain what the differences are between the two.
What is shared WordPress hosting?
In shared hosting, a number of websites share the resources of a single server. Shared hosting is a good starter solution, if your website has a few hundreds visits a week. However, migrate to a dedicated solution as soon as the website traffic increases because the performance of shared hosting services is very limiting.
In a shared hosting environment the security of your WordPress website depends on the security of other websites running on the same server. Since all the websites are running on the same server, an attacker in some cases can hack your website through a hacked website on the same server. So your efforts are almost futile unless all websites on the server are secured properly.
Dedicated WordPress hosting
With a dedicated WordPress hosting plan all the server’s resources are used solely by your website. Also, when using a dedicated server you can install all the software and applications you like. However, you also need to take care of the server’s hardening, security and management.
Hosting Features
Once you decide on the type of WordPress hosting solution you need for your website, start comparing the hosting providers that provide such service. Here are some tips on what you need to look out for and test when choosing your hosting provider, irrelevant if it is WordPress managed hosting or self-hosting.
Web hosting support
Support is one of the most important factors. Your website will be running on a server which is installed somewhere in a datacentre, to which you do not have physical access to. Therefore when something goes wrong, or you cannot connect to your website anymore, the hosting provider’s support engineers are the only people who can save your day. A very good response time and a technical team are a must.
If you are new to WordPress look for a hosting provider whose support can help you troubleshoot both hosting and WordPress issues. There are quite a few hosting providers that provide very good WordPress support.
Level of support
To get an idea of how good the provider’s support and after sales service is, read user reviews and ratings on independent platforms and forums. If possible, give it a shot for yourself by asking as many questions as you can during your evaluation. You can also ask for a free trial on which you can run a test website. Many WordPress web hosts do provide a free trial.
WordPress hosting provider performance
Performance is critical. Website speed can effect your website’s SEO and number of visits. There are quite a few tools you can use to test the performance of a web host. For example you can setup a simple website and use tools such as Pingdom and GTmetrix (free tools) to measure how long it takes for a website to load.
Hosting provider uptime
The uptime of your website should be as close to 100% as possible. However, achieving a 100% uptime is nearly impossible because problems do happen and maintenance is required. Though many hosting providers guarantee a 99.9% uptime.
Good hosting providers back their uptime guarantee with a reimbursement policy in their service level agreement (SLA). Many hosting providers also have a status page on their website, from where you can see the status of their network, connections, servers’ health etc.
WordPress hosting pricing
The idiom you get what you pay for applies to WordPress hosting providers as well. Although not always, in most cases the more you pay the better the service will be.
1 note
·
View note
Photo

Have you installed and started using the new WordPress 'Twenty Twenty' theme? This tutorial will show you how to download, install and set up the new WordPress Twenty Twenty theme for your new website. 0:00 WordPress Twenty Twenty Theme Overview 0:15 Download WordPress 0:45 Create Hosting Account 1:35 Setup FTP 2:50 Upload WordPress Zip to Server 6:10 Extract WordPress in File Manager 8:05 Setup Database 10:56 Setup and Install WordPress CMS 12:17 WordPress Twenty Twenty Theme Brief Overview 13:10 WordPress Twenty Twenty Theme Wrap-up Once you have this new WordPress Twenty Twenty theme installed follow our next tutorials on how to customize and develop your new WordPress Twenty Twenty theme website. Find more WordPress tutorials on our website at https://finalwebdesign.com/tutorials/wordpress-tutorials or this post at https://finalwebdesign.com/tutorials/wordpress-tutorials/wordpress-twenty-twenty-theme-installation. Contact our team today to learn my on our website at https://finalwebdesign.com/contact-us or calling our team at (888) 674-7779 today. #wordpress #webdesign #website #seo #webdevelopment #blog #ecommerce #digitalmarketing #business #web #wordpressthemes #webdeveloper #marketing #blogger #wordpressblogger #wordpressdeveloper #webdesigner #wordpressblog #wordpresswebsite #websitedesign #html #php #woocommerce #webhosting #design #wordpressdesign #branding #google #css (at Miami, Florida) https://www.instagram.com/p/B7AF5IUlspW/?igshid=zzh800605kfc
#wordpress#webdesign#website#seo#webdevelopment#blog#ecommerce#digitalmarketing#business#web#wordpressthemes#webdeveloper#marketing#blogger#wordpressblogger#wordpressdeveloper#webdesigner#wordpressblog#wordpresswebsite#websitedesign#html#php#woocommerce#webhosting#design#wordpressdesign#branding#google#css
1 note
·
View note
Text
How to Install and Setup WordPress Multisite Network
Do you want to set up and install WordPress multisite network? WordPress comes with a built-in capability to create multiple websites using the same WordPress installation.
A WordPress multisite network is used by blogs, schools, and businesses, who need to run separate websites but want to manage them under one dashboard.
In this article, we will show you how to properly install and setup a WordPress multisite network.
Since this is a comprehensive article, we have added the table of contents for easier navigation:
WordPress Multisite Basics
What is WordPress Multisite?
Pros of using a WordPress multisite network
Cons of using a WordPress multisite network
Who needs a WordPress multisite network?
WordPress Multisite Installation and Set up
Requirements for a WordPress multisite network
Choosing a domain structure for your multisite network
Setting up wildcard subdomains
Enabling WordPress multisite network feature
Setting up your WordPress multisite network
WordPress Multisite Configuration Settings
Configuring network settings
Opening your multisite network for registrations
New site settings
Upload settings for your multisite network
Plugin menu settings
Setting up Default Content, Theme, and Plugins
Adding new sites to your WordPress multisite network
Adding themes and plugins to your multisite network
Adding default Content to new sites
Troubleshooting and FAQs
Troubleshooting WordPress multisite issues
FAQs about WordPress multisite
What is WordPress Multisite Network?
A WordPress Multisite network allows you to run and manage multiple WordPress sites or blogs from a single WordPress installation.
It enables you to create new sites instantly and manage them using the same username and password. You can even allow other users to signup and create their own blogs on your domain.
The WordPress multisite network comes with advanced settings that you can use to customize each website / blog on your network.
Pros of Using a WordPress Multisite Network
In many situations, a WordPress multisite network can be more useful than managing multiple standalone WordPress sites. Here are some of the advantages of using a WordPress multisite network:
As the network administrator, you can easily manage multiple sites from a single dashboard.
Each site on the network can have its own admins. The site admins will have the capabilities to manage only their own website.
You can install plugins / themes and activate them for multiple sites with one download.
Multisite network also makes it easier for you to manage updates. You only need to update your WordPress, plugins, or themes on one “master” install.
Cons of Using a WordPress Multisite Network
Creating a WordPress multisite network is not always helpful in managing multiple sites. Here are some of the disadvantages that you should keep in mind before setting up a multisite network.
All sites on the network share the same resources. This means that when your network is down, all other sites go down as well.
It’s not easy to manage traffic and server resources for the beginner level users. In case, one of your websites gets unexpected traffic, then it will affect all other websites on the network.
If one website gets hacked, then this means all sites on your network will get hacked.
Some WordPress plugins may not work well on a multisite network.
WordPress multisite network is not properly supported by all web hosting providers which limits your options. We will talk more about this later in the article.
Who needs a WordPress multisite network?
Just because you manage multiple WordPress websites does not mean you need to start using a multisite network.
There are third party tools to manage multiple WordPress sites from a single dashboard. Tools like InfiniteWP or iThemes Sync make it easier to maintain multiple WordPress sites under one roof without switching back and forth from one site to another.
Here are some scenarios when creating a multisite network makes sense:
A magazine website with different sections managed by different teams.
A business website with sub-sites for different locations and branches.
Government or non-profit websites can use WordPress multisite for different departments, locations, and regions.
Your own network of blogs running on multiple subdomains.
Schools and colleges allowing students to create their own blogs on school servers.
Requirements for a WordPress Multisite Network
All websites on a WordPress multisite network share the same server resources. This means that the most important thing you will need is a good WordPress hosting.
If you are planning on having just a couple of websites with low traffic, then you can probably get away with shared hosting.
However, due to the nature of multisite network, you’d need VPS hosting or a dedicated server as your sites grow.
We recommend Bluehost because they offer both shared hosting and VPS/Dedicated servers, and they are also one of the official WordPress hosting partners.
If you’re looking for an alternative, then SiteGround and WP Engine provide excellent service for WordPress multisite network.
Apart from web hosting, you will need the basic knowledge of how to install WordPress and editing files using FTP.
Choosing a Domain Structure for your Multisite Network
On a WordPress multisite network, you can add new sites using either subdomains or sub-directories.
Example of subdomain: http://bit.ly/2GcT2Gs
Example of sub-directory: http://bit.ly/2rzkB2g
If you choose subdomains, then you will have to configure wildcard subdomains on your server. We will show you how to do that in the next step.
On the other hand, if you choose sub-directories or path based URLs for sites on your network, then you can skip the next step.
Setting Up Wildcard Subdomains
If you decide to use subdomains for websites on your multisite network, then you will need to setup wildcard subdomains for your multisite network.
To do that, first you need to login to your WordPress hosting account’s cPanel dashboard. After that, you need to scroll down to the ‘Domains’ section and then click on ‘Subdomains’.
Note: Depending on your web hosting service, your cPanel dashboard may look slightly different than the screenshot above. This screenshot is from the cPanel on Bluehost.
On the next page, you need to enter the * sign in the subdomain field and select your main domain from the drop-down menu.
Cpanel will automatically detect the document root and will display it in the field below. Now click on the ‘Create’ button to add your wildcard subdomain.
Enabling WordPress Multisite Network Feature
Multisite Network feature comes built-in with each WordPress installation. All you need to do is install and setup WordPress like you normally would. After that, you just need to enable the multisite feature.
You can also enable the multisite feature on any existing WordPress site. Before you enable multisite, don’t forget to create a complete backup of your WordPress site.
To enable Multisite, connect to your site using a FTP client or cPanel file manager, and open the wp-config.php file for editing.
You need to add the following code to your wp-config.php file just before the /* That’s all, stop editing! Happy blogging. */ line.
/* Multisite */ define( 'WP_ALLOW_MULTISITE', true );
Once you are done, you can save and upload your wp-config.php file back to the server.
This code simply enables the multisite feature on your WordPress site. Once enabled, you will still need to setup the multisite network.
Setting Up Your WordPress Multisite Network
Now that you have successfully enabled the Multisite Network feature on your WordPress site, it is time to set up your network.
If you are setting up a mutlisite network on an existing WordPress website, then you will need to deactivate all plugins on your site.
Simply visit the Plugins » Installed Plugins page and select all plugins. You need to select ‘Deactivate’ from the ‘Bulk Actions’ dropdown menu and then click on the ‘Apply’ button.
You can now head over to Tools » Network Setup page to configure your multisite network.
On the network setup screen, you will see a notice that you need Apache’s mod_rewrite module installed on your server. This module is installed and enabled on all the best WordPress hosting providers.
The next thing you need to do is to tell WordPress what kind of domain structure you will be using for sites in your network, e.g. Subdomains or Sub-directories.
After that, you would need to provide a title for your network and make sure that the email address in the Network admin email is correct.
Click on the install button to continue.
WordPress will now show you some code that you need to add to your wp-config.php and .htaccess file respectively.
You can use an FTP client or file manager in the cPanel to copy and paste the code in these two files.
After that you will need to re-login to your WordPress site to access the multisite network.
Configuring Network Settings
Now that you have setup the multisite network, it is time to configure network settings.
You need to switch to the ‘Network Dashboard’ to change network settings, add new sites, and configure other settings.
When you take your mouse over to the ‘My Sites’ menu in the admin toolbar, a flydown popup will appear. Click on the Network Admin » Dashboard.
This will take you to the multisite network dashboard. You will notice that there are new menu items to manage your multisite network. You will also see a “Right Now” dashboard widget that allows you to create a new site and add new users.
To configure network settings, you need to click on the ‘Settings’ link in the admin sidebar.
The first option on network settings page is to set your site title and admin email address. These fields will be filled automatically with the network title and admin email you entered during setup.
Opening Your Multisite Network for Registrations
The ‘Registration Settings’ section on the network settings page is probably the most important setting in your network setup.
By default, both user and site registrations are disabled on the network.
You can choose to open your site for user registration, or allow existing users to create new sites, or allow both user and site registration.
If you are opening your multisite network to registration, then you can check the box next to ‘Registration Notification’ option to receive email notifications every time a new user or site is registered.
If you want to allow individual site administrators to add new users on their sites, then you can check the box next to ‘Add New Users’ option.
Limited Email Registration option allows you to limit site or user registration to email addresses from specific domains. This is particularly useful if you only want to allow people from your own organization to register and create users or sites.
Similarly, you can also ban certain domains from registration.
New Site Settings
The ‘New Site Settings’ section allows you to configure default options for new sites created on your multisite network.
You can modify the welcome emails and the contents of first default post, page, and comment in these settings.
As a network administrator, you can change these settings anytime.
Upload Settings for Your Multisite Network
It is important for you to keep an eye on the usage of your server resources. Under the Upload Settings section, you can limit the total amount of space a site can use for uploads.
The default value is 100 MB which is probably good for at least 100 photo uploads. You can increase or decrease this space depending on how much disk space you have.
The default upload file types are images, audio, video, and pdf files. You can add additional file types if you want like doc, docx, odt, etc.
After that, you can choose a file size limit, so that users can’t upload insanely large files to the server.
Plugin Menu Settings
Next, you can jump to the menu settings. It will allow you to enable the administrative menu for the plugins section on your network sites.
Enabling this will show plugins menu to respective site admins. They can activate or deactivate a plugin on their individual sites, but they cannot install new plugins.
Once you are satisfied with all the configuration settings, make sure to click on the ‘Save Changes’ button.
Adding New Sites to Your WordPress Multisite Network
To add a new site to your WordPress multisite network, simply click on ‘Sites’ under My Sites » Network Admin menu in the admin toolbar.
This will show you a list of sites on your current multisite installation. By default, you have your primary site listed as the only site in your WordPress multisite network.
To add a new site, click on the ‘Add New’ button at the top.
On the ‘Add New Site’ page, you need to provide the site’s address. You don’t need to type the full address, just the part you want to use as subdomain or sub-directory.
Next, you need to add a site title, and enter the site admin’s email address.
You can add an admin email address other than the one that you are currently using to manage your multisite network.
If the email address is not currently in use by another user, then WordPress will create a new user and send the username and password to the email address you enter.
Once you are done, click on the ‘Add Site’ button.
A new site will be added to your WordPress multisite network. As the network admin, you will receive a new site registration email as well.
If you created a new user, then that user will receive an email with instructions to set a new password and login.
Adding Themes and Plugins to Your Multisite Network
By default, individual site administrators in a multisite network cannot install themes and plugins on their own.
As the network admin, you can install the respective plugins and themes, so it’s available for all sites on your network.
Installing themes for your multisite network
To add themes, go to My Sites » Network Admin » Themes page.
On this page, you will see a list of currently installed themes on your WordPress multisite.
You can make a theme available to other sites by clicking on ‘Network Enable’ option under that theme. You can also disable a theme by clicking on ‘Network Disable’ link under the theme. Note: Network Disable option will only appear when the theme is enabled.
To add a new theme, you need to click on the ‘Add New’ button at the top of your screen and then install a WordPress theme as you would normally do.
Once the new theme is installed, you will be able to make it available to other sites on your network with the ‘Network Enable’ option.
If you need recommendations on which themes to make available to your network, take a look at our picks of the best WordPress themes that you can use.
Best free WordPress blog themes
Best free WordPress photography themes
Best WordPress multi-purpose themes
Setting a default theme for your Multisite Network
After you have added a couple of themes, WordPress will still activate the default WordPress theme for each new site.
If you want to make another theme to be the default theme for new sites, then you need to add the following code to your wp-config.php file.
// Setting default theme for new sites define( 'WP_DEFAULT_THEME', 'your-theme' );
Replace your-theme with the name of your theme. You will need to use the name of the theme’s folder, which you can find out by looking at the /wp-content/themes/ folder.
Installing plugins for your multisite network
Similarly, you can visit My Sites » Network Admin » Plugins page to install plugins and click on the ‘Network Activate’ link below each plugin to activate them on your multisite network.
Following are a few essential WordPress plugins that we recommend for every website:
WPForms – It is the best WordPress contact form plugin and allows you to quickly create beautiful forms using simple drag and drop form builder.
Yoast SEO – It is the most comprehensive WordPress SEO plugin on the market and will help you get more visitors from search engines.
SeedProd – Site admins may want to see a coming soon page as they work on their sites. SeedProd allows them to add beautiful coming soon and maintainence mode landing pages
WP Mail SMTP – WP Mail SMTP helps you fix WordPress not sending email issue by using SMTP server to send crucial multisite registration and notification emails.
For more plugin recommendations, see our list of the essential WordPress plugins for all websites.
Note: If you have enabled the Plugins Menu option for site admins in the ‘Network Settings’ previously, then the site administrators can activate or deactivate installed plugins on their own. Site admins cannot delete or install a new plugin on their own.
Adding Default Content to Multisite Sites
By default, WordPress allows you to edit some default content for each site on your multisite network. You can go to Settings » Network Settings page and add them under the section ‘New site settings’.
You can edit the content for the default post, page, and comment. We recommend replacing the default content with something more useful for your site admins.
What if you wanted additional default content to be added to each new site?
By default, WordPress does not give you an option to create additional default content for new sites. If you want to do that, then you will need to add custom code to your WordPress multisite.
In this example, we are going to add a new default page to be created for each new site.
add_action('wpmu_new_blog', 'wpb_create_my_pages', 10, 2); function wpb_create_my_pages($blog_id, $user_id){ switch_to_blog($blog_id); // create a new page $page_id = wp_insert_post(array( 'post_title' => 'About', 'post_name' => 'about', 'post_content' => 'This is an about page. You can use it to introduce yourself to your readers or you can simply delete it.', 'post_status' => 'publish', 'post_author' => $user_id, // or "1" (super-admin?) 'post_type' => 'page', 'menu_order' => 1, 'comment_status' => 'closed', 'ping_status' => 'closed', )); restore_current_blog(); }
You can use the same code with little modifications to create default posts for new sites. Check out the following code:
add_action('wpmu_new_blog', 'wpb_create_my_pages', 10, 2); function wpb_create_my_pages($blog_id, $user_id){ switch_to_blog($blog_id); // create a new page $page_id = wp_insert_post(array( 'post_title' => 'A sample blog post', 'post_name' => 'sample-blog-post', 'post_content' => 'This is just another sample blog post. Feel free to delete it.', 'post_status' => 'publish', 'post_author' => $user_id, // or "1" (super-admin?) 'post_type' => 'post', )); restore_current_blog(); }
Troubleshooting WordPress Multisite Issues
Most common issues with WordPress multisite network setup occur due to incorrect configuration of wildcard subdomains and domain mapping issues. Make sure that your web host supports wildcard subdomains before setting up multisite.
Following are some other common issues and their quick fixes.
Fixing login issues on multisite installs
Another common issue is that when using WordPress multisite with sub-directories, some users are unable to login to the admin area of their sites after they add the required code in wp-config.php file.
To fix this, try replacing
define('SUBDOMAIN_INSTALL', false);
line in wp-config.php file with
define('SUBDOMAIN_INSTALL', 'false');
Find unconfirmed users
Another issue that you may come across is not being able to find users who registered on your network but didn’t get the activation email. To fix this issue, see our guide on how to find pending unconfirmed users in WordPress.
Exporting a site from multisite to its own WordPress install
Later at some point, you or another site owner may want to export a site from multisite to its own WordPress install. This can be easily done. For step by step instructions see our guide on how to move a site from WordPress multisite to single install.
You may also want to bookmark our ultimate guide of common WordPress errors and how to fix them. It will save you a lot of time by quickly fixing the most common WordPress issues.
FAQs About WordPress Multisite Network
Many of our users have asked us plenty of questions about WordPress multisite network and how to use it more efficiently. Following are the most frequently asked questions that we have answered.
1. Would I be able to better manage my sites with a multisite network?
To be honest, the answer really depends on your usage scenario.
For example, if your websites are not related to each other, then you would be better off with a multiple site management tool, like InifiteWP.
If you manage multiple sites for a restaurant chain, university, or online magazine, then WordPress multisite will be more efficient.
2. Does WordPress multisite make my websites load faster?
Once again it depends on several factors. Better WordPress hosting with plenty of server resources will allow multisite to be faster but then again with these resources, individual WordPress sites will also run faster.
However, on a shared hosting account, traffic spikes will increase memory usage and slow down all websites on the multisite network at the same time. To improve multisite speed, see our guide on WordPress performance and speed optimization.
3. Can I add an online store to a WordPress Multisite Website?
Yes, you can add an online store in WordPress multisite network. Most likely, you will be using an eCommerce plugin like WooCommerce for that, which is compatible with WordPress multisite.
4. Can I install ‘x plugin’ on my WordPress multisite?
Some WordPress plugins may not be compatible with WordPress multisite. Normally, plugin authors mention it on the plugin’s website and you can avoid installing a plugin that may not work on a multisite setup. However, if it is not mentioned, then it is safe to assume that it is multisite compatible.
4. How do I share user logins and roles across the multisite network?
By default, a user who is registered on one site cannot register or be added to another site on the same network. That’s because they are already registered in the shared WordPress database. However, they don’t have any user role privileges on other sites.
You can use third-party plugins like WP Multisite User Sync to sync users across the network. However, you need to be careful as you may end up giving someone admin privileges to a site.
We hope this article helped you learn how to install and setup WordPress multisite network. You may also want to see our step by step WordPress security guide to protect and keep your WordPress multisite secure.
If you liked this article, then please subscribe to our YouTube Channel for WordPress video tutorials. You can also find us on Twitter and Facebook.
The post How to Install and Setup WordPress Multisite Network appeared first on WPBeginner.
😉SiliconWebX | 🌐WPBeginner
1 note
·
View note